Full stack developers usually focus on UI, API and DB aspects of an application. However, it is becoming more important that developers understand the continuous deployment basics so that apps are deployed frequently and users can benefit from it. Azure Pipelines are Azure Devops offering for performing Continuous Integration/Continuous Delivery. If your code is hosted in a public repository, then you do not have pay a cent to use Pipelines. If it is private, then you get 30 hours of free usage every month.
There are more complex tasks that can be done with the Azure Pipelines. The purpose of this post is to get you familiarize with the environment. Therefore, in this post we will setup a simple pipeline to Build, Test and Deploy a Dll to a local folder.
Assumption
To practice the steps mentioned in this post, following are required
- A solution containing a Class Library/Console App project and a Unit Test project already hosted in Github or Azure repos. Github Project used in this post is here
- An Azure Devops account
TL;DR
Setting up CI/CD pipeline in Azure Devops is a straightforward process, yet offering a wide variety of third party integration options. In short, creating the pipeline involves just setting up following components. Again not all of them maybe required.
- Organization and Project
- Agent
- Build pipeline
- Release pipeline
Setting up Organization and Project in Azure Devops
Organization and project help in organizing the source code repositories and pipelines. It is not at all mandatory to have repository to set up a pipeline or vice versa.
- Sign in to your Azure Devops account
- Click on “New Organization” (You can skip this step, if you prefer to use an existing organization account). Make sure that you select a region closest to your home location for hosting the project.

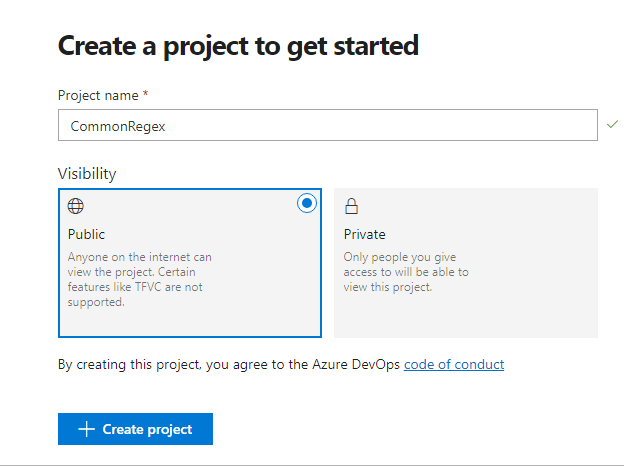
- Create a new Project.
Setting up Agent
An agent is required if we need to do build or/and deployment locally. In our case, we need an agent to deploy build output to a local folder. However, Build will be done using one of the Hosted agents. Hosted Agents need not always meet project requirements and therefore, in such cases it is best to use a self hosted agent.
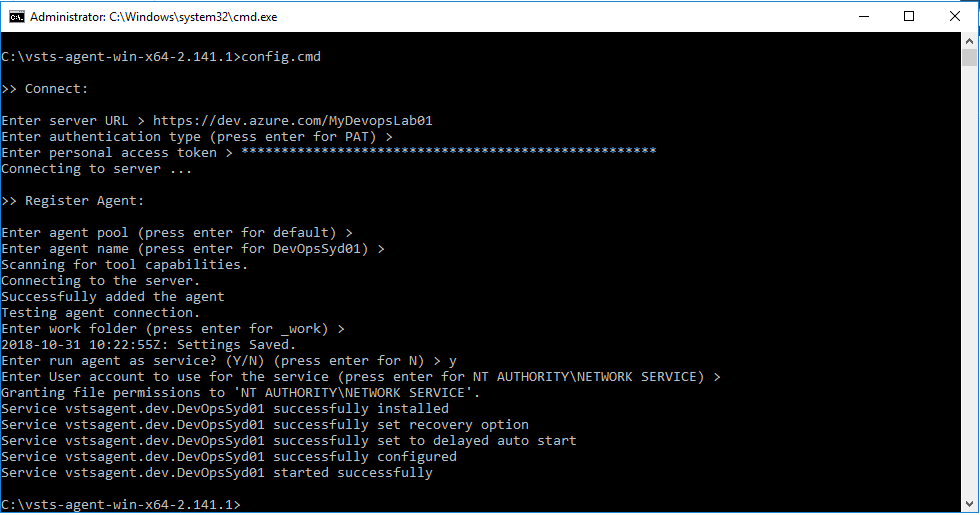
- Go to Project Settings → Agent Pools and click on “Download agent” (note that Project Settings is at the bottom of the navigation menu)
- Extract the folder and navigate to agent folder in a command prompt window opened in Administrator mode
- Execute the command “config.cmd”. Enter following details when prompted
- Server Url → Example is https://dev.azure.com/MyDevopsLab01. Replace “MyDevopsLab01” with the organization name used in the earlier step
- PAT (Personal Access Token) → To create a temporary PAT, open Security from Profile options. Once open, create a PAT and copy it to command prompt
- Select defaults for all the remaining options except for “Run Agent as service”.
Note
1. If everything went fine, there should be a new windows service created called “vsts agent…”.
2. There must be a new agent available under the “Default” agent pool and marked as Online.
Setting up Build pipeline
Azure supports yaml based Build Pipeline configuration. this gives us opportunity to track the build configuration changes in the source control. However, we will use the visual designer to set up the pipeline as this helps to understand the environment better. We could generate the yaml config from the visual designer too.
- Open the new Project created under the Organization
- Select Builds from Pipelines
- Click on “New Pipeline”
- Click on “Use the Visual Designer”
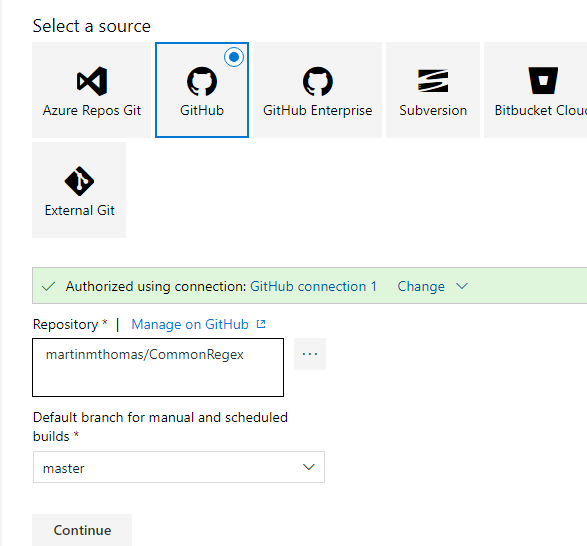
- Select the Source and provide additional details
- Select a repository and branch
- Select “Empty Job” as template
- Select “Hosted VS2017” as the Agent Pool in Pipeline task. If the solution was created using Visual Studio 2013 or older then use “Hosted” agent pool.

- Add Nuget Resotre task under the Agent job. This is required only if the solution relies on nuget packages.
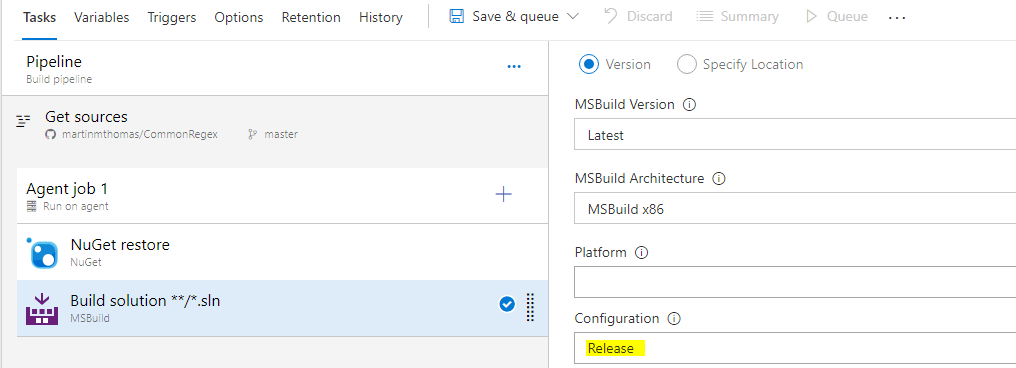
- Add MSBuild task under the Agent job and enter Configuration as Release
- Add Visual Studio Test task. This helps in running all the unit test projects in the solution. This is optional, only because this is a sample build pipeline :).
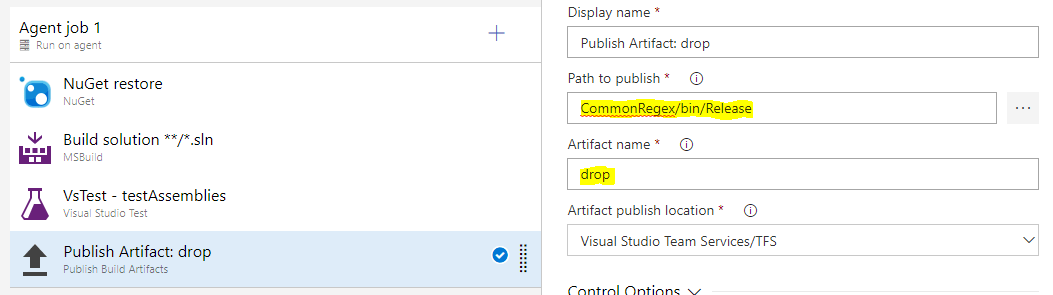
- Add Publish Build Artifact task and provide the “Path to publish”.
- Since our aim is to copy the Dll to local and our Build Configuration is set as “Release” in the previous step, the path points to Release folder in the project path.
- Artifact name is important and we can use the default value “drop”. When we set up the Release pipeline later, “drop”, i.e., CommonRegex/bin/Release, will act as the source for Release tasks.
- Click “Save & Queue”
- Note that when queuing a manual build, there will be a popup where we can set up values for variables. Variables help to dynamically configure the build pipeline tasks. Since we did not configure any variables, this list will be blank.
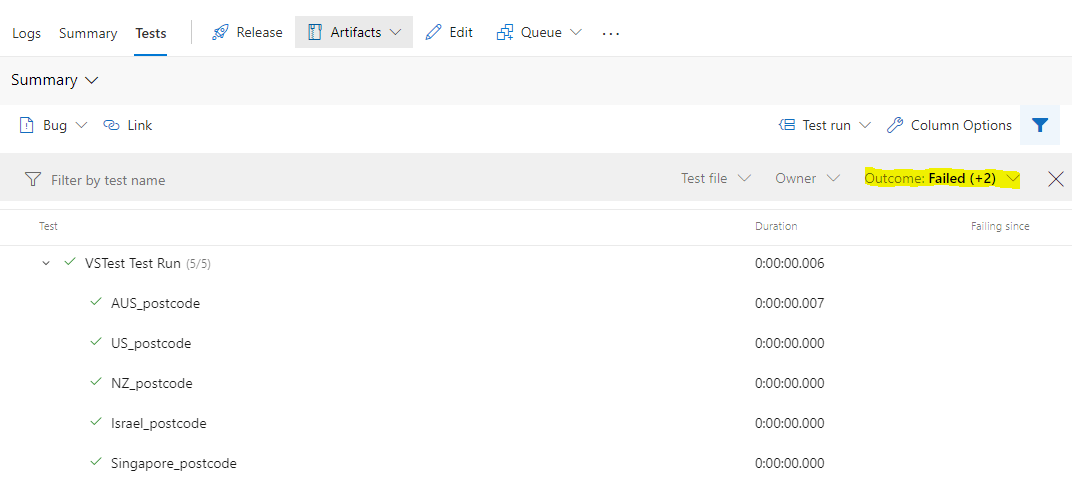
- Click on the hyperlink to see the build progress. Here we could see the logs, summary and mainly tests status.
- Note that “drop” file container has been created with build artifacts

- Tests’, including failed tests’, details can be accessed from “Tests” tab and using one of the filters available there.
- Note that “drop” file container has been created with build artifacts
Setting up Release pipeline
Lets build the Release pipeline now. We will use the previous Build pipeline to set up a continuous release pipeline.
- Click Releases on the navigation menu and add a “New Pipeline”
- Select “Empty Job” instead of using one of the templates
- Rename the stage to “Publish to local”
- Click “Add an artifact”
- Select our build pipeline from the Source dropdown and select “Latest” as the Default Version

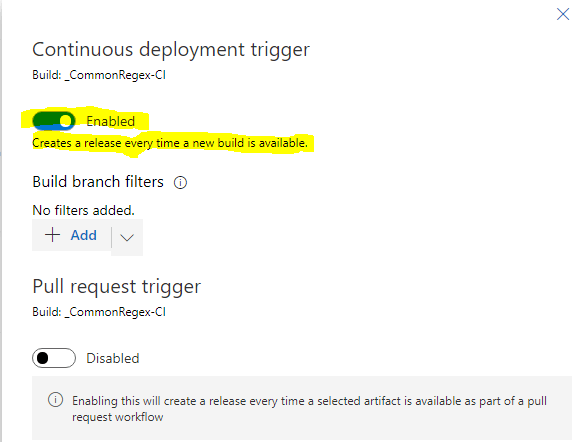
- Click on little flash like icon to set up the Continuous deployment trigger. Enable the continuous deployment trigger.
- Click on Tasks tab
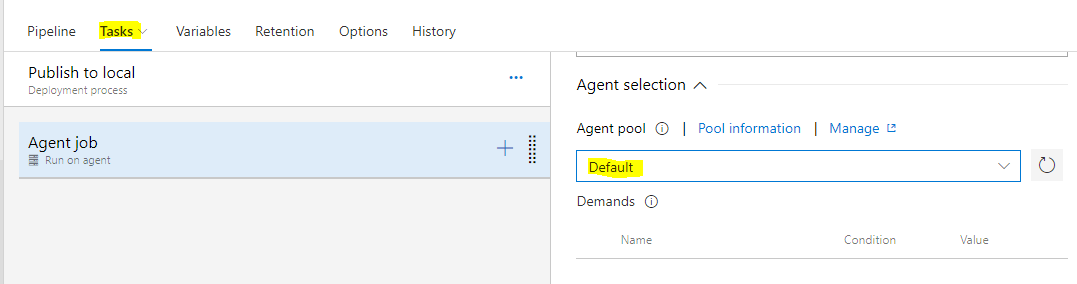
- Click on “Agent Job” and select “Default” as the agent pool. Note that “Default” is the name of the agent pool we used in the beginning of this post.
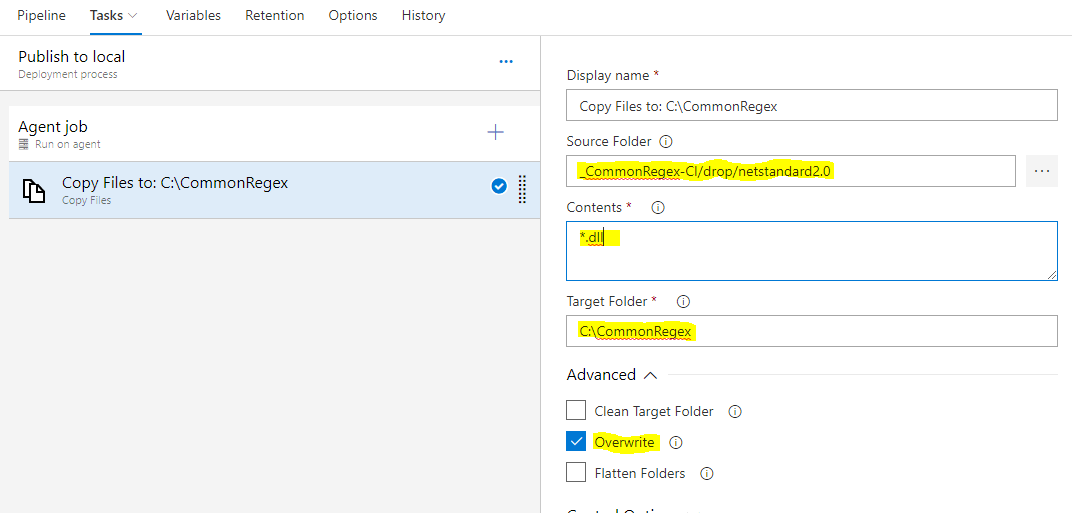
- Add “Copy Files” task under Agent Job and set the highlighted fields based on your project settings.
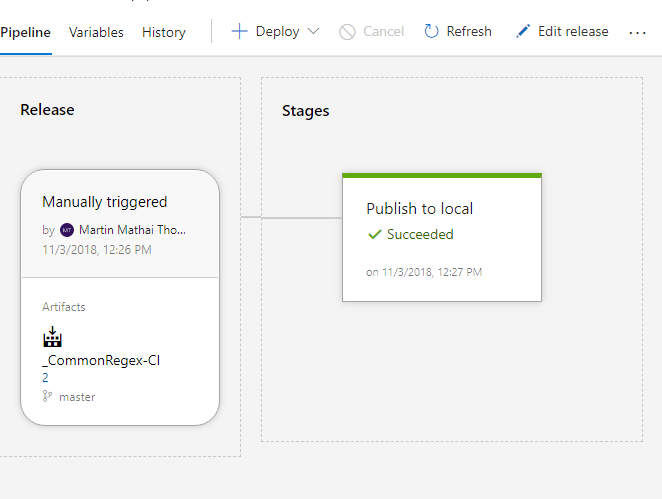
- Click on Save and then Create a Release.
- Clicking on Release hyperlink opens the summary page.
Summary
This post barely covers the basics of Azure pipeline capabilities. It is important to highlight that using the YAML configuration for Build pipeline is the right approach and this is easy to do once you have got yourself familiarized with the environment.
Hope this post has shed some lights on using the Pipeline for handling simple use cases. Feel free to post your questions on the comments section.
