Data analysis is probably the only technical work that every role, in addition to developers, in a team is supposed to do for different reasons. These reasons include,
- verify if a production issue is due to a data issue or not
- make minor system configuration changes using an “Update/Insert” statement
- find relationship between multiple tables to figure out related features in an application to understand the impact of doing an enhancement
- extracting data and sending to interested parties securely
The purpose of this post is to explain a few options in SQL Server Management Studio (SSMS) that could help you do your tasks easier whether you are a developer or someone just interested in exploring the application data. Note that all the sql examples provided in this post uses AdventureWorks2017 database provided by Microsoft.
Keyboard Shortcuts
One of the most widely used shortcut among developers is Alt+F1. This displays the definition of the selected object. When a table name is selected, the definition includes a lot of useful information like column names and data type, foreign key relationships, indexes, constraints, etc. Behind the scenes this shortcut executes an SP named sp_help. Now, if you want to see where this is configured, go to
Tools –> Options –> Environment –> Keyboard –> Query Shortcuts
There are 12 shortcut keys that you can define for any sql statement. For example, in my machine I have Ctrl+3 set to select all records from the highlighted table. Note that there is an extra space at the end and it is set as “select * from “. When analyzing complex SPs, I frequently use this shortcut to see the table contents without opening another query window or typing the Select statement.

Startup
In the Environment Options (see previous figure), you could specify the Startup behavior of SSMS. When starting SSMS it opens only the Object Explorer but we could configure it to open a new Query Window too. To do this, select “Open Object Explorer and query window” in the Startup Options. I wonder why this is not the default behavior considering that SSMS is an editor!
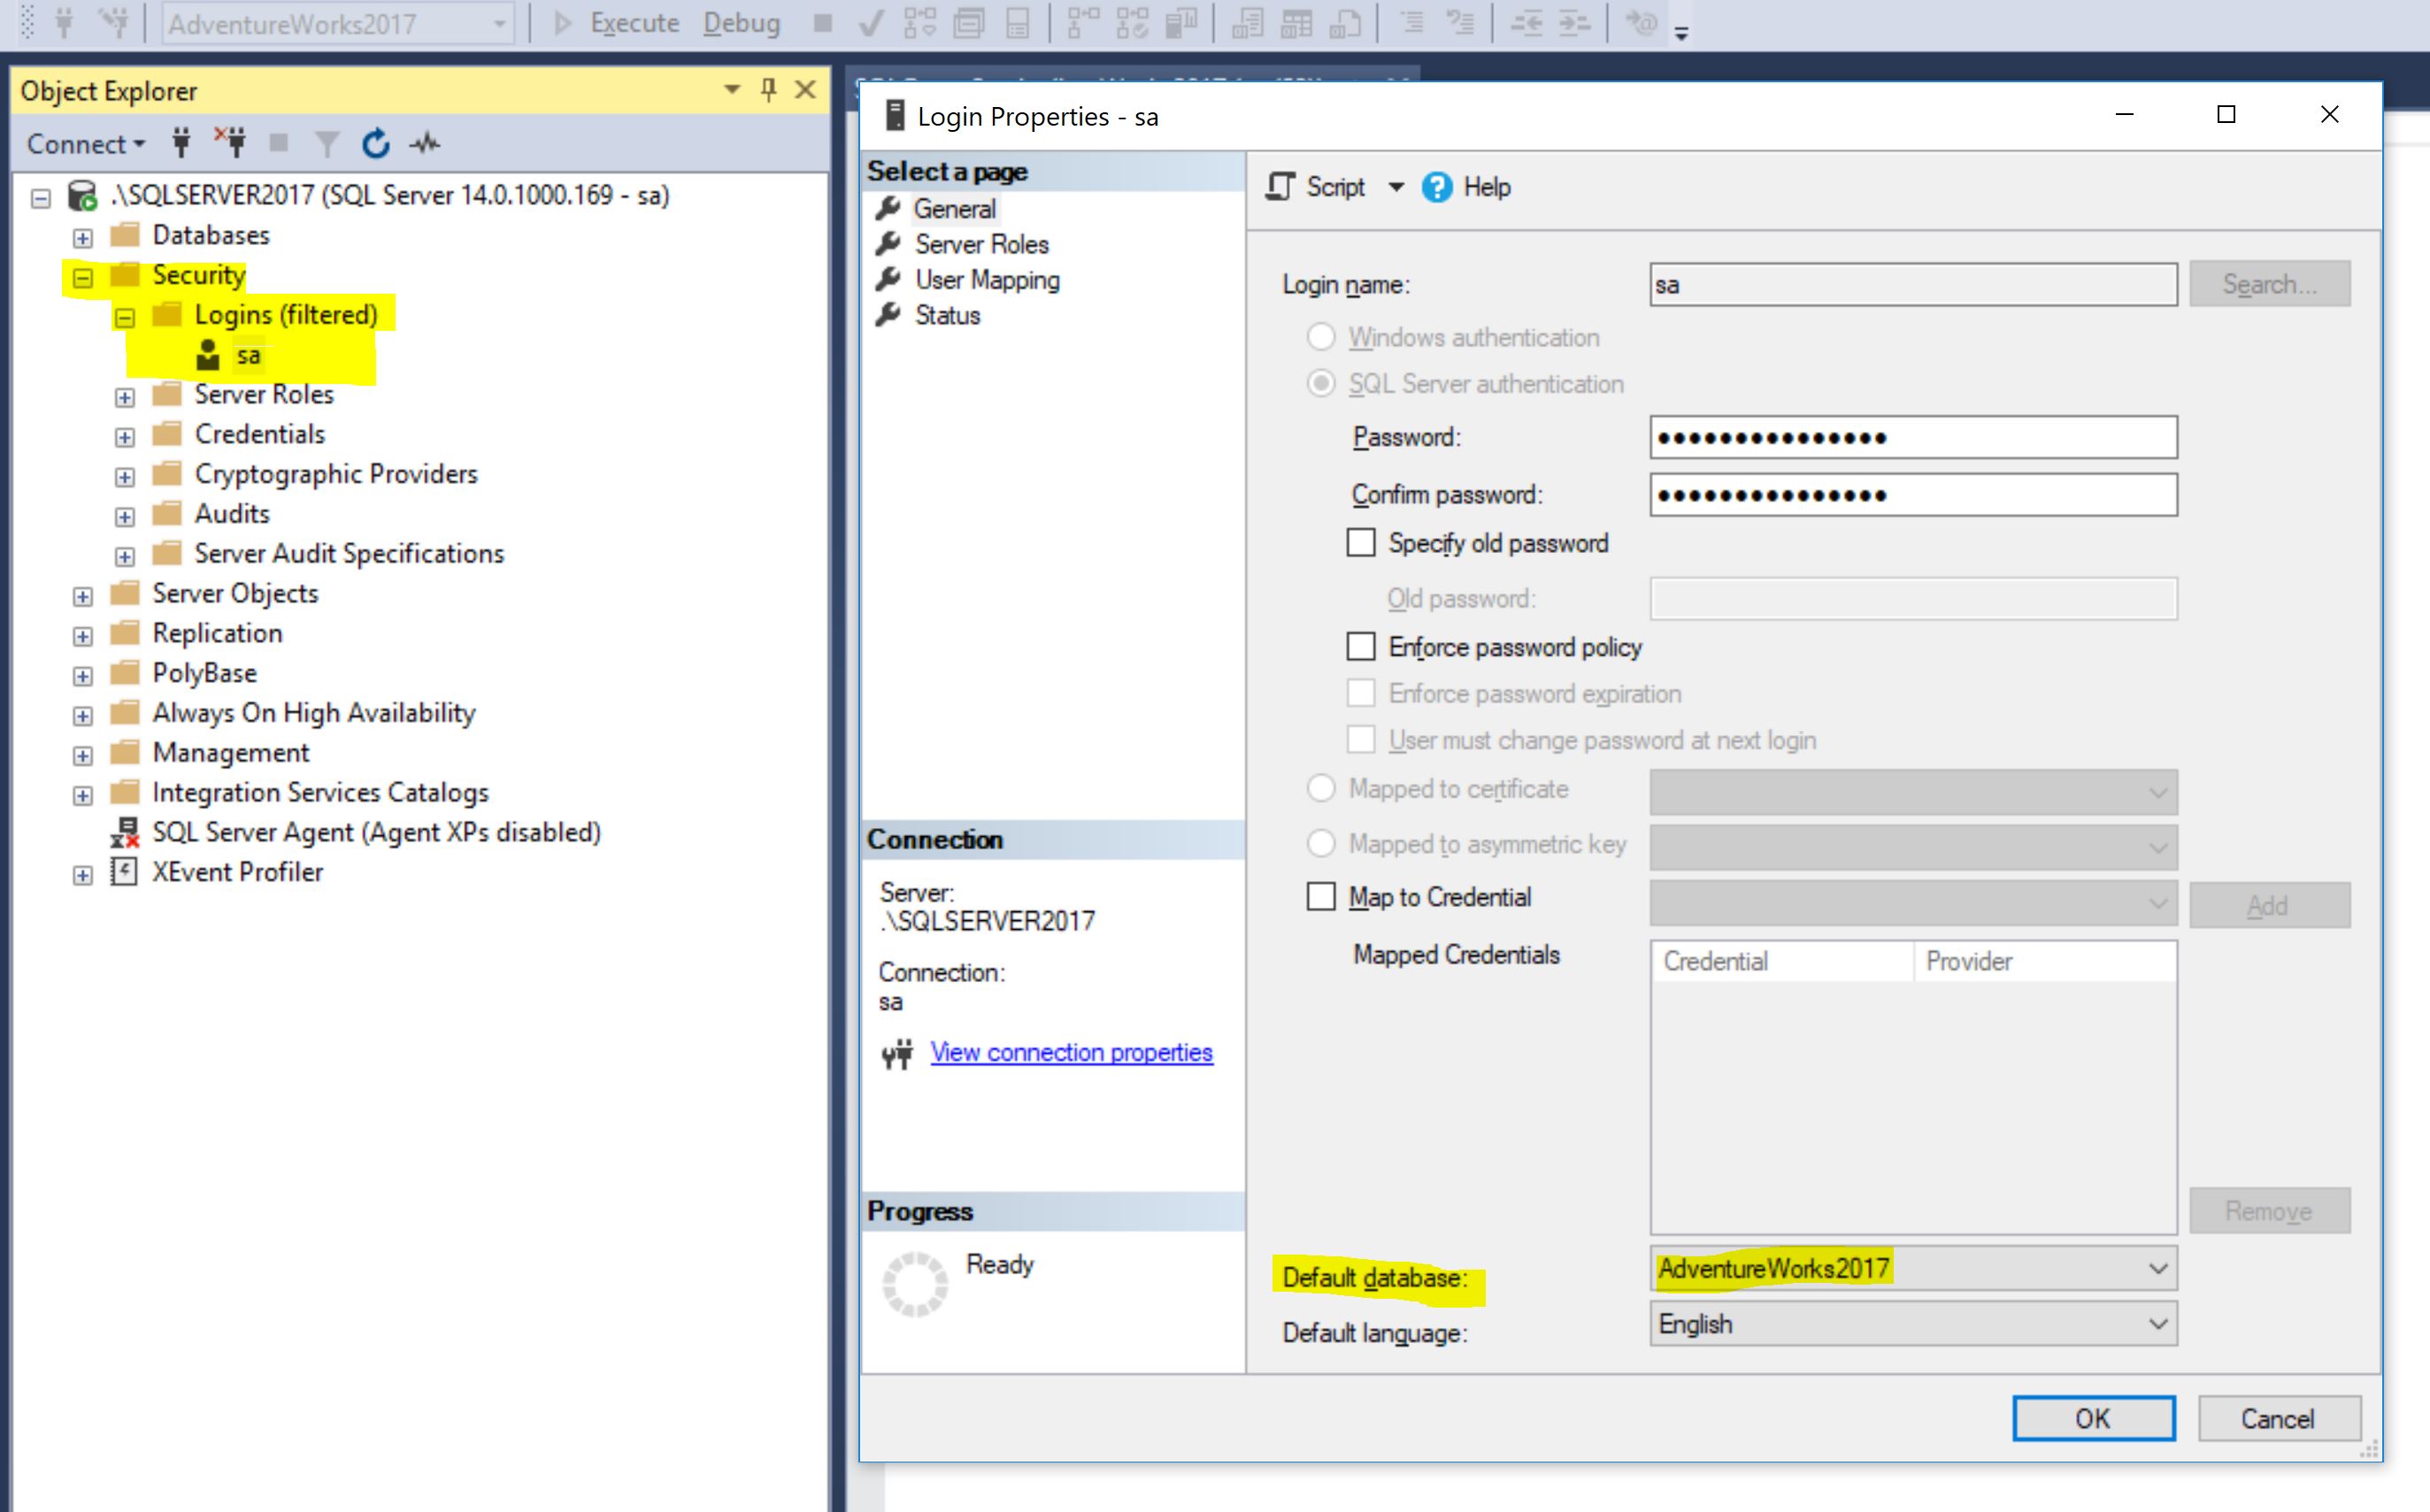
Now, most likely you are going to see “master” as the target database in the query window. If you have a preferred database, then you can set the “Default database” for the login and this will ensure that the query window uses your preferred database as the target database.
Generating Scripts
SSMS makes it easier to do all the data and definition changes. However, it is important to script the changes so that these can be included in the release process. Therefore, SSMS offers different ways to generate scripts depending on the type of change. One of the main options is “Generate Scripts” which can be used to script the creation of multiple database objects. Lets see how we can create a data insertion script for one or more tables.
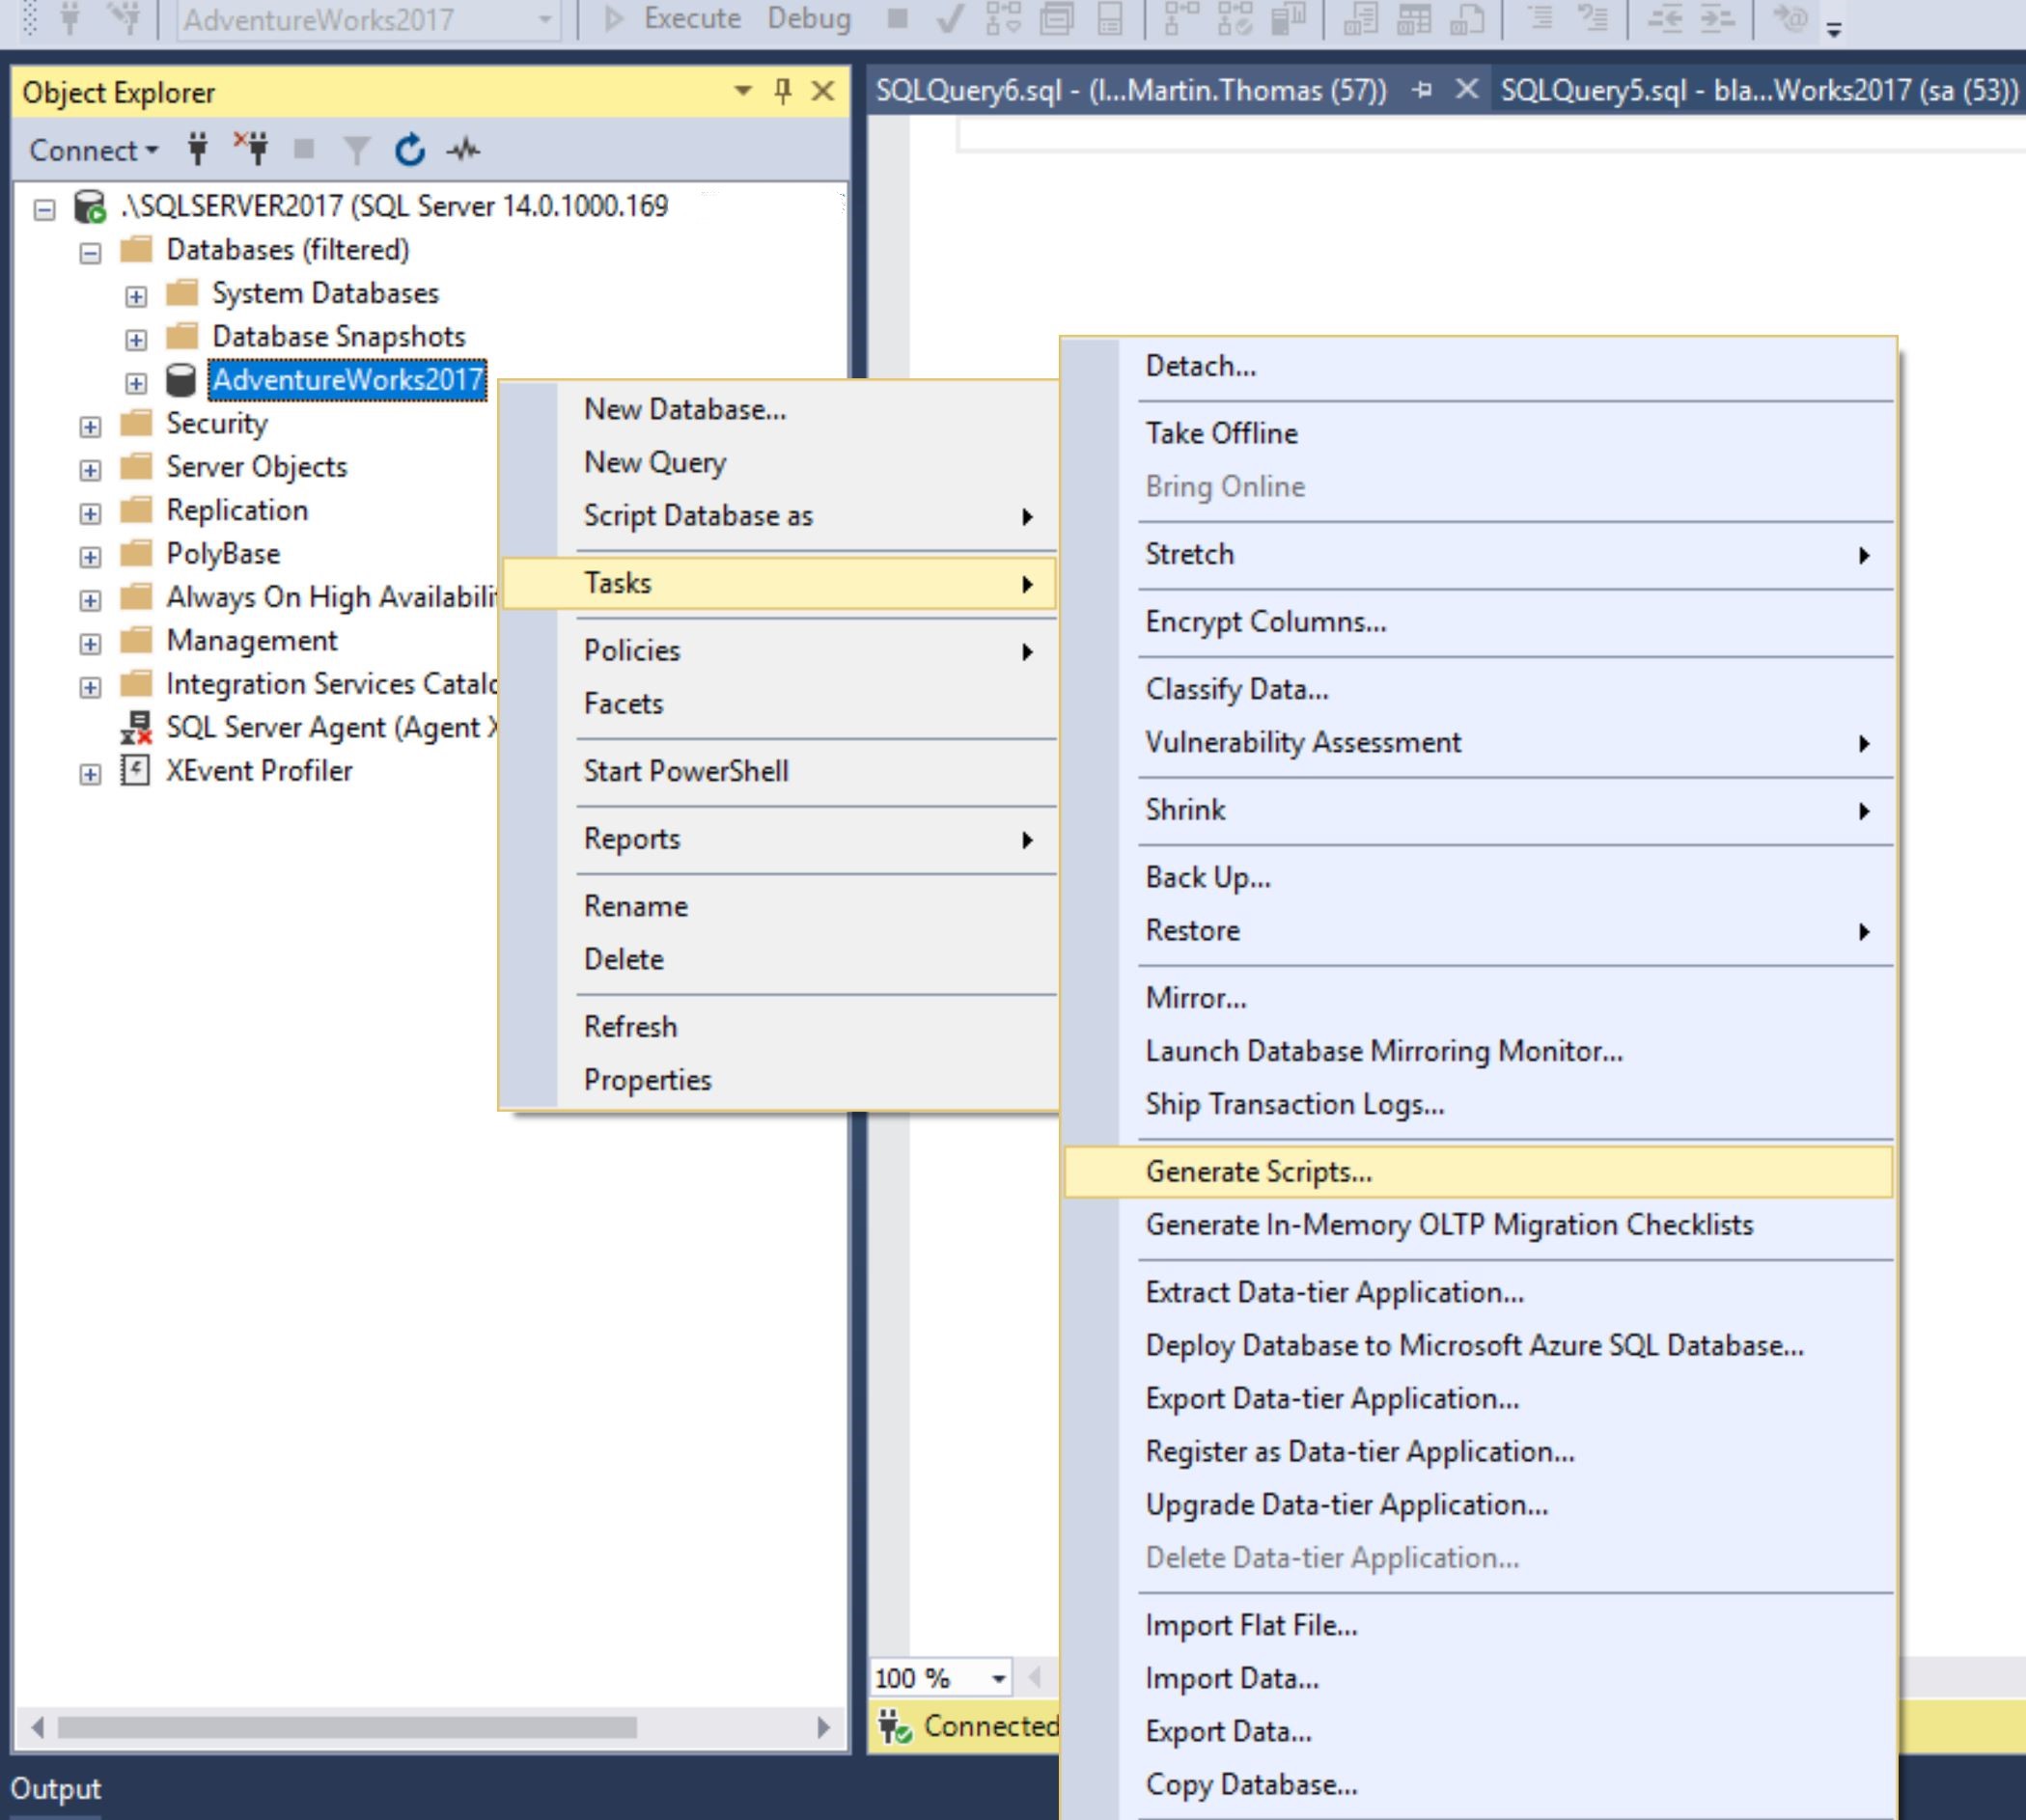
Go to Generate Scripts as shown in the figure below. This opens a wizard to script different object types like tables, views, SPs, etc.
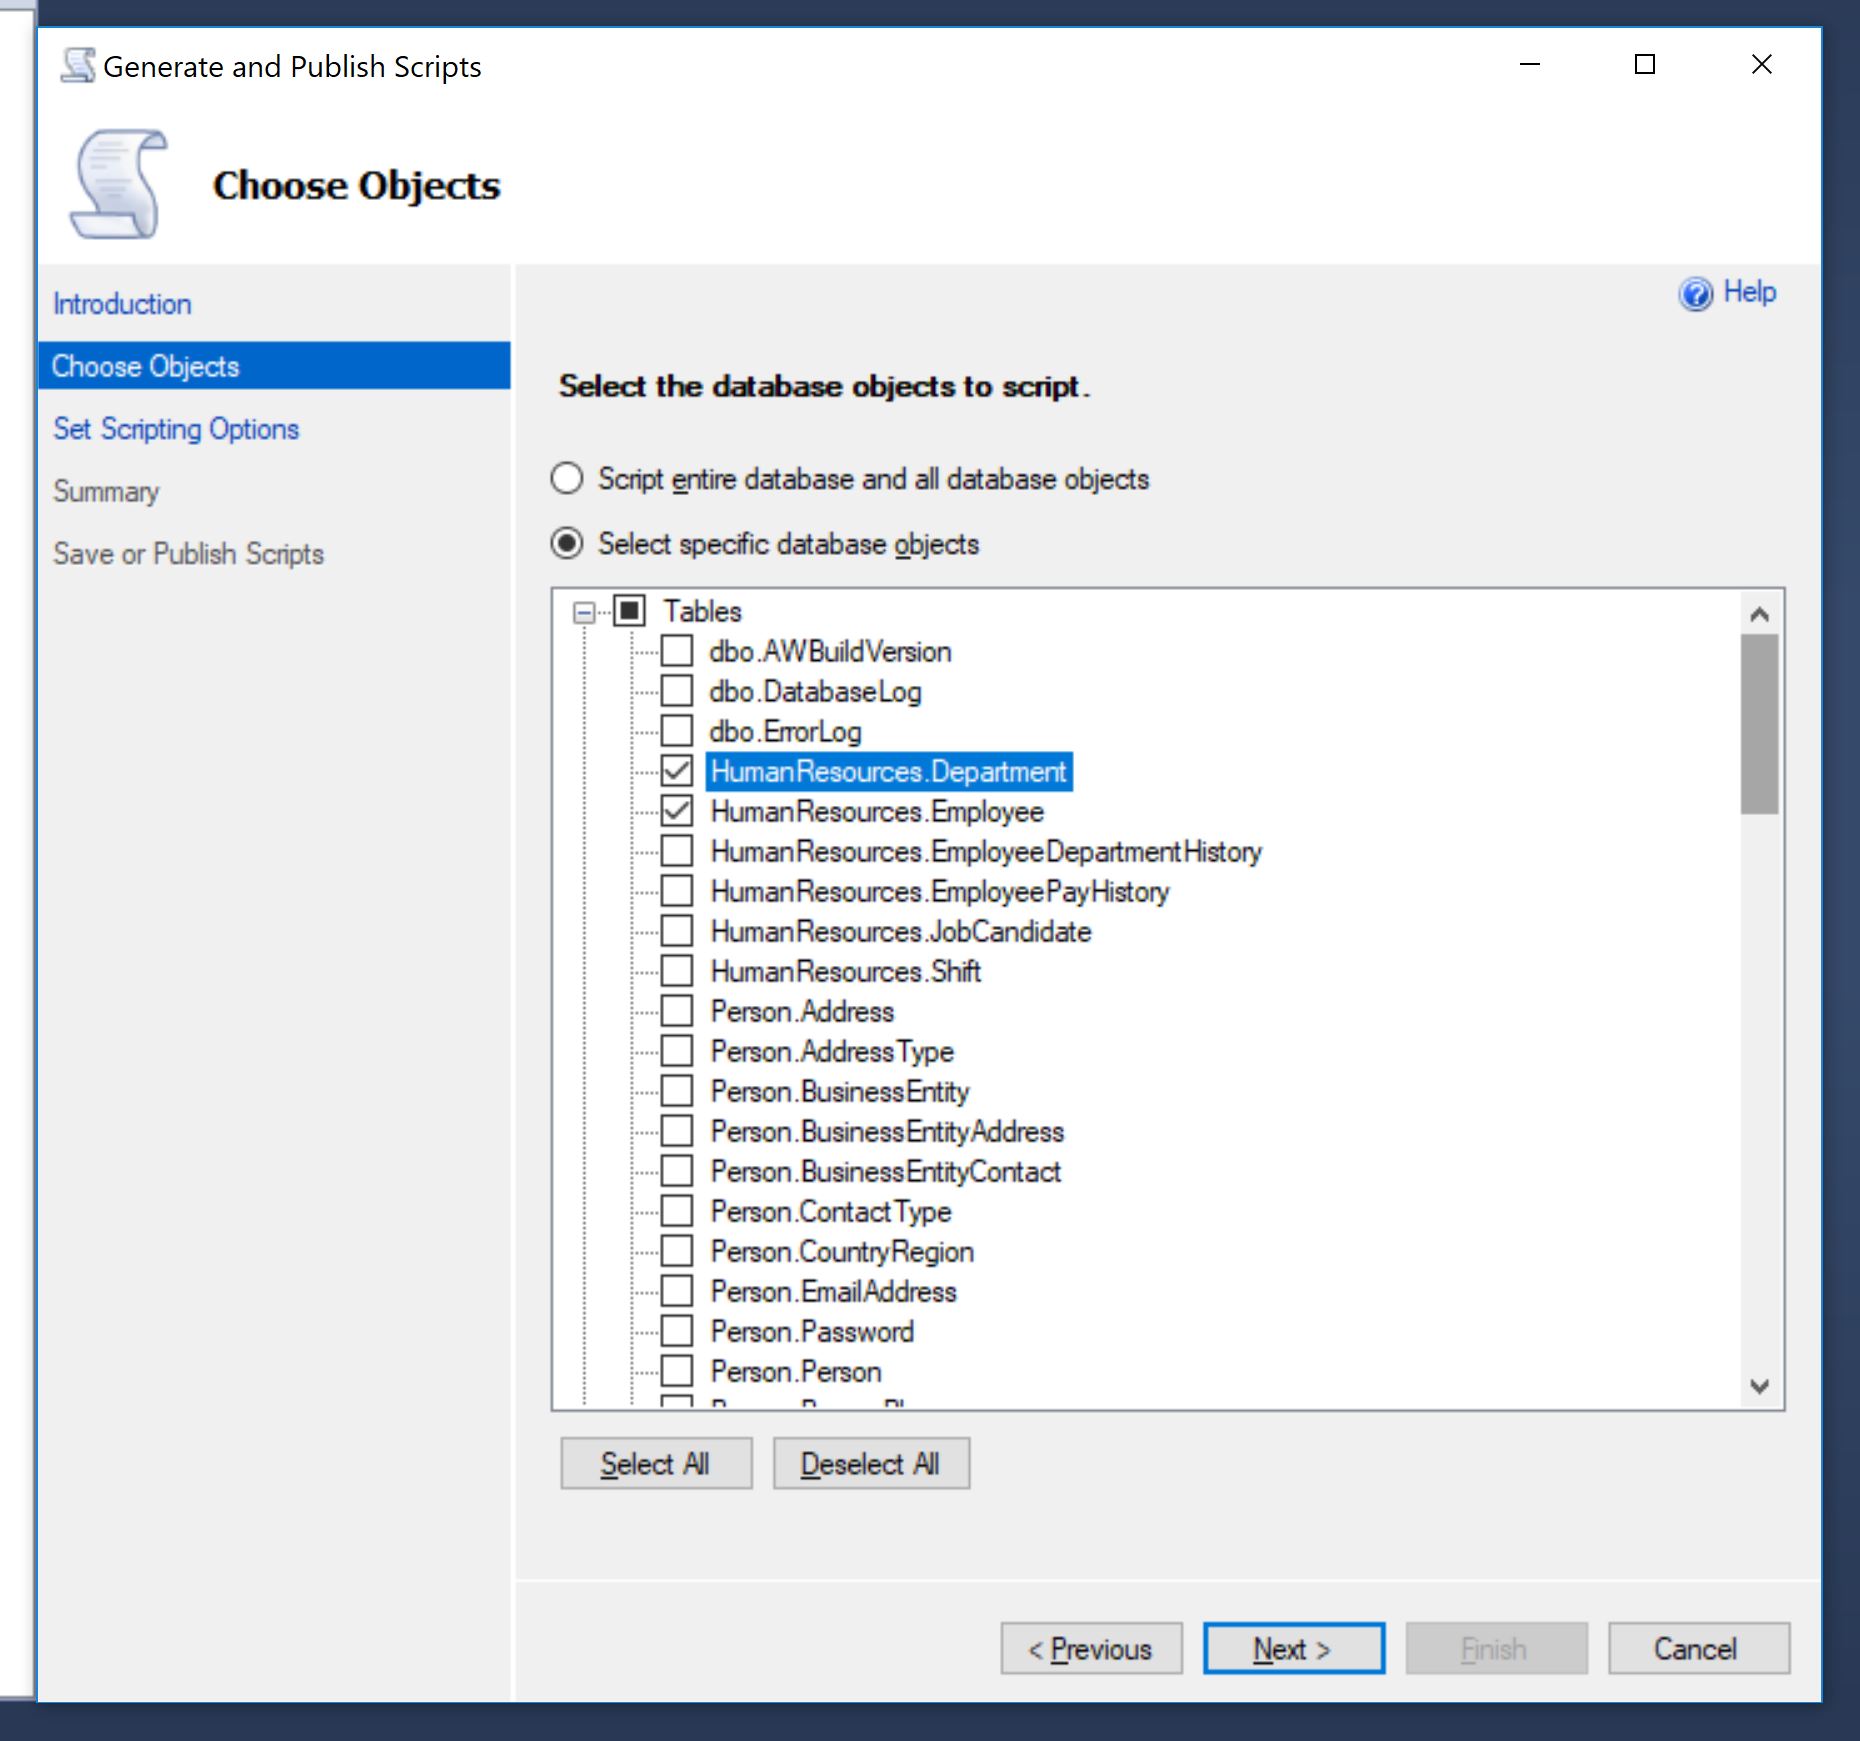
In the wizard, expand “Tables” and select desired table(s). I am selecting two of the tables. Note that, you can script any type of objects available in the list and not just tables but I am selecting tables just to show how to create data insertion script.
In the final step, it is necessary to update the options in the Advanced tab to make sure that data is included in the generated script. The default option is to include only table schema.

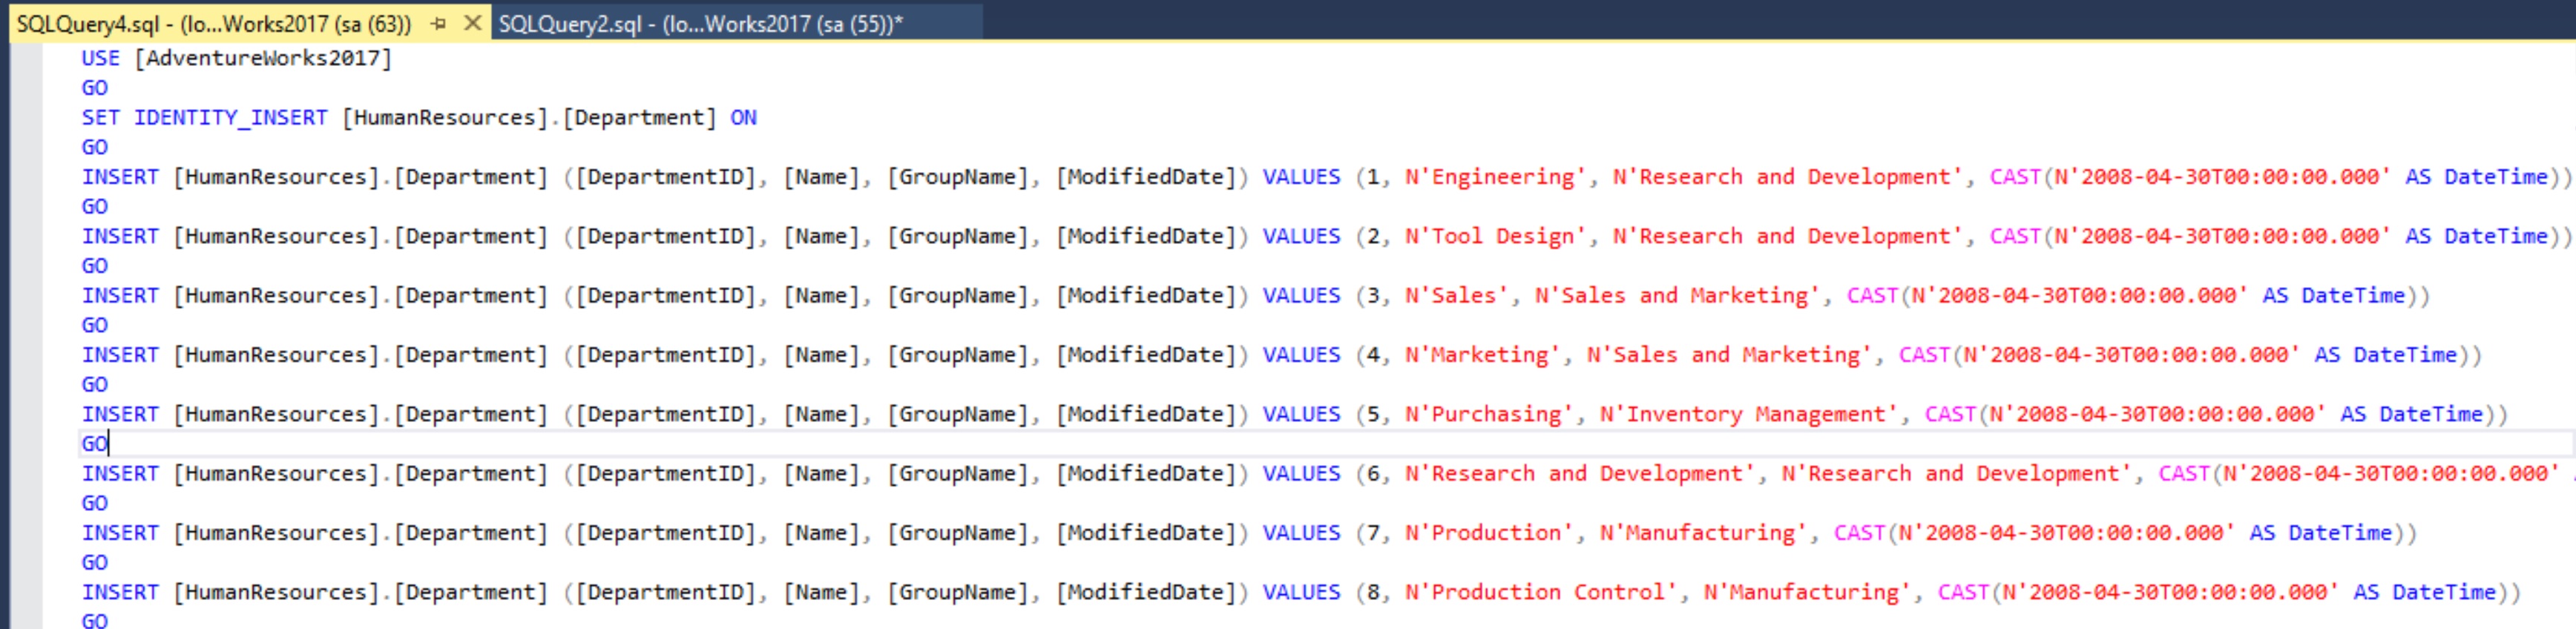
There are two options in the final step (see figure above) that should be verified for the data scripts. One is the “Script USE DATABASE” option which is set to true by default. Make sure that this is set to false if the generated script is going to be used in environments other than in the source server. The other one is “Save to new query window” option. I selected this option because I wanted to see the output straight away.
Editing Table content
This is a feature I have never used myself but I have seen a lot of non-developers use quite frequently. If you want to make edits (insert/update/delete) without writing sql statements then you could use the “Edit Top 200 Rows” option by right clicking the table name and selecting this option. This opens a new tab displaying top 200 rows.
If the table has more than 200 rows then add a “Criteria” to filter the rows. Right click and select the option “Pane –> Criteria” (or press Ctrl+2). Now, make the changes you wanted to do. Note that whenever you edit a cell and click another cell (or tab out), SSMS verifies the change and lets you know if it is a valid change or not. Once all the changes are made, right click and select “Execute SQL” (or press Ctrl+r).
Code Snippets
Code Snippets, in any IDE, provide option to capture frequently used statements under a keyboard shortcut. Note that this in no way should lead to code duplicity. Code snippets are not at all an alternative to refactoring. Code snippets should be used only to minimise the effort in writing certain otherwise complex programming constructs. We could use snippets as an effective alternative to creating scripts for data analysis in certain situations. Lets say, Employee table is one of the tables that you frequently use whenever there is a bug or say, currently you are working on an Employee feature. We might need to run select statements on Employee and related tables often. In such a case, we could write the statements and save it as a snippet. An example of such a snippet is given below,
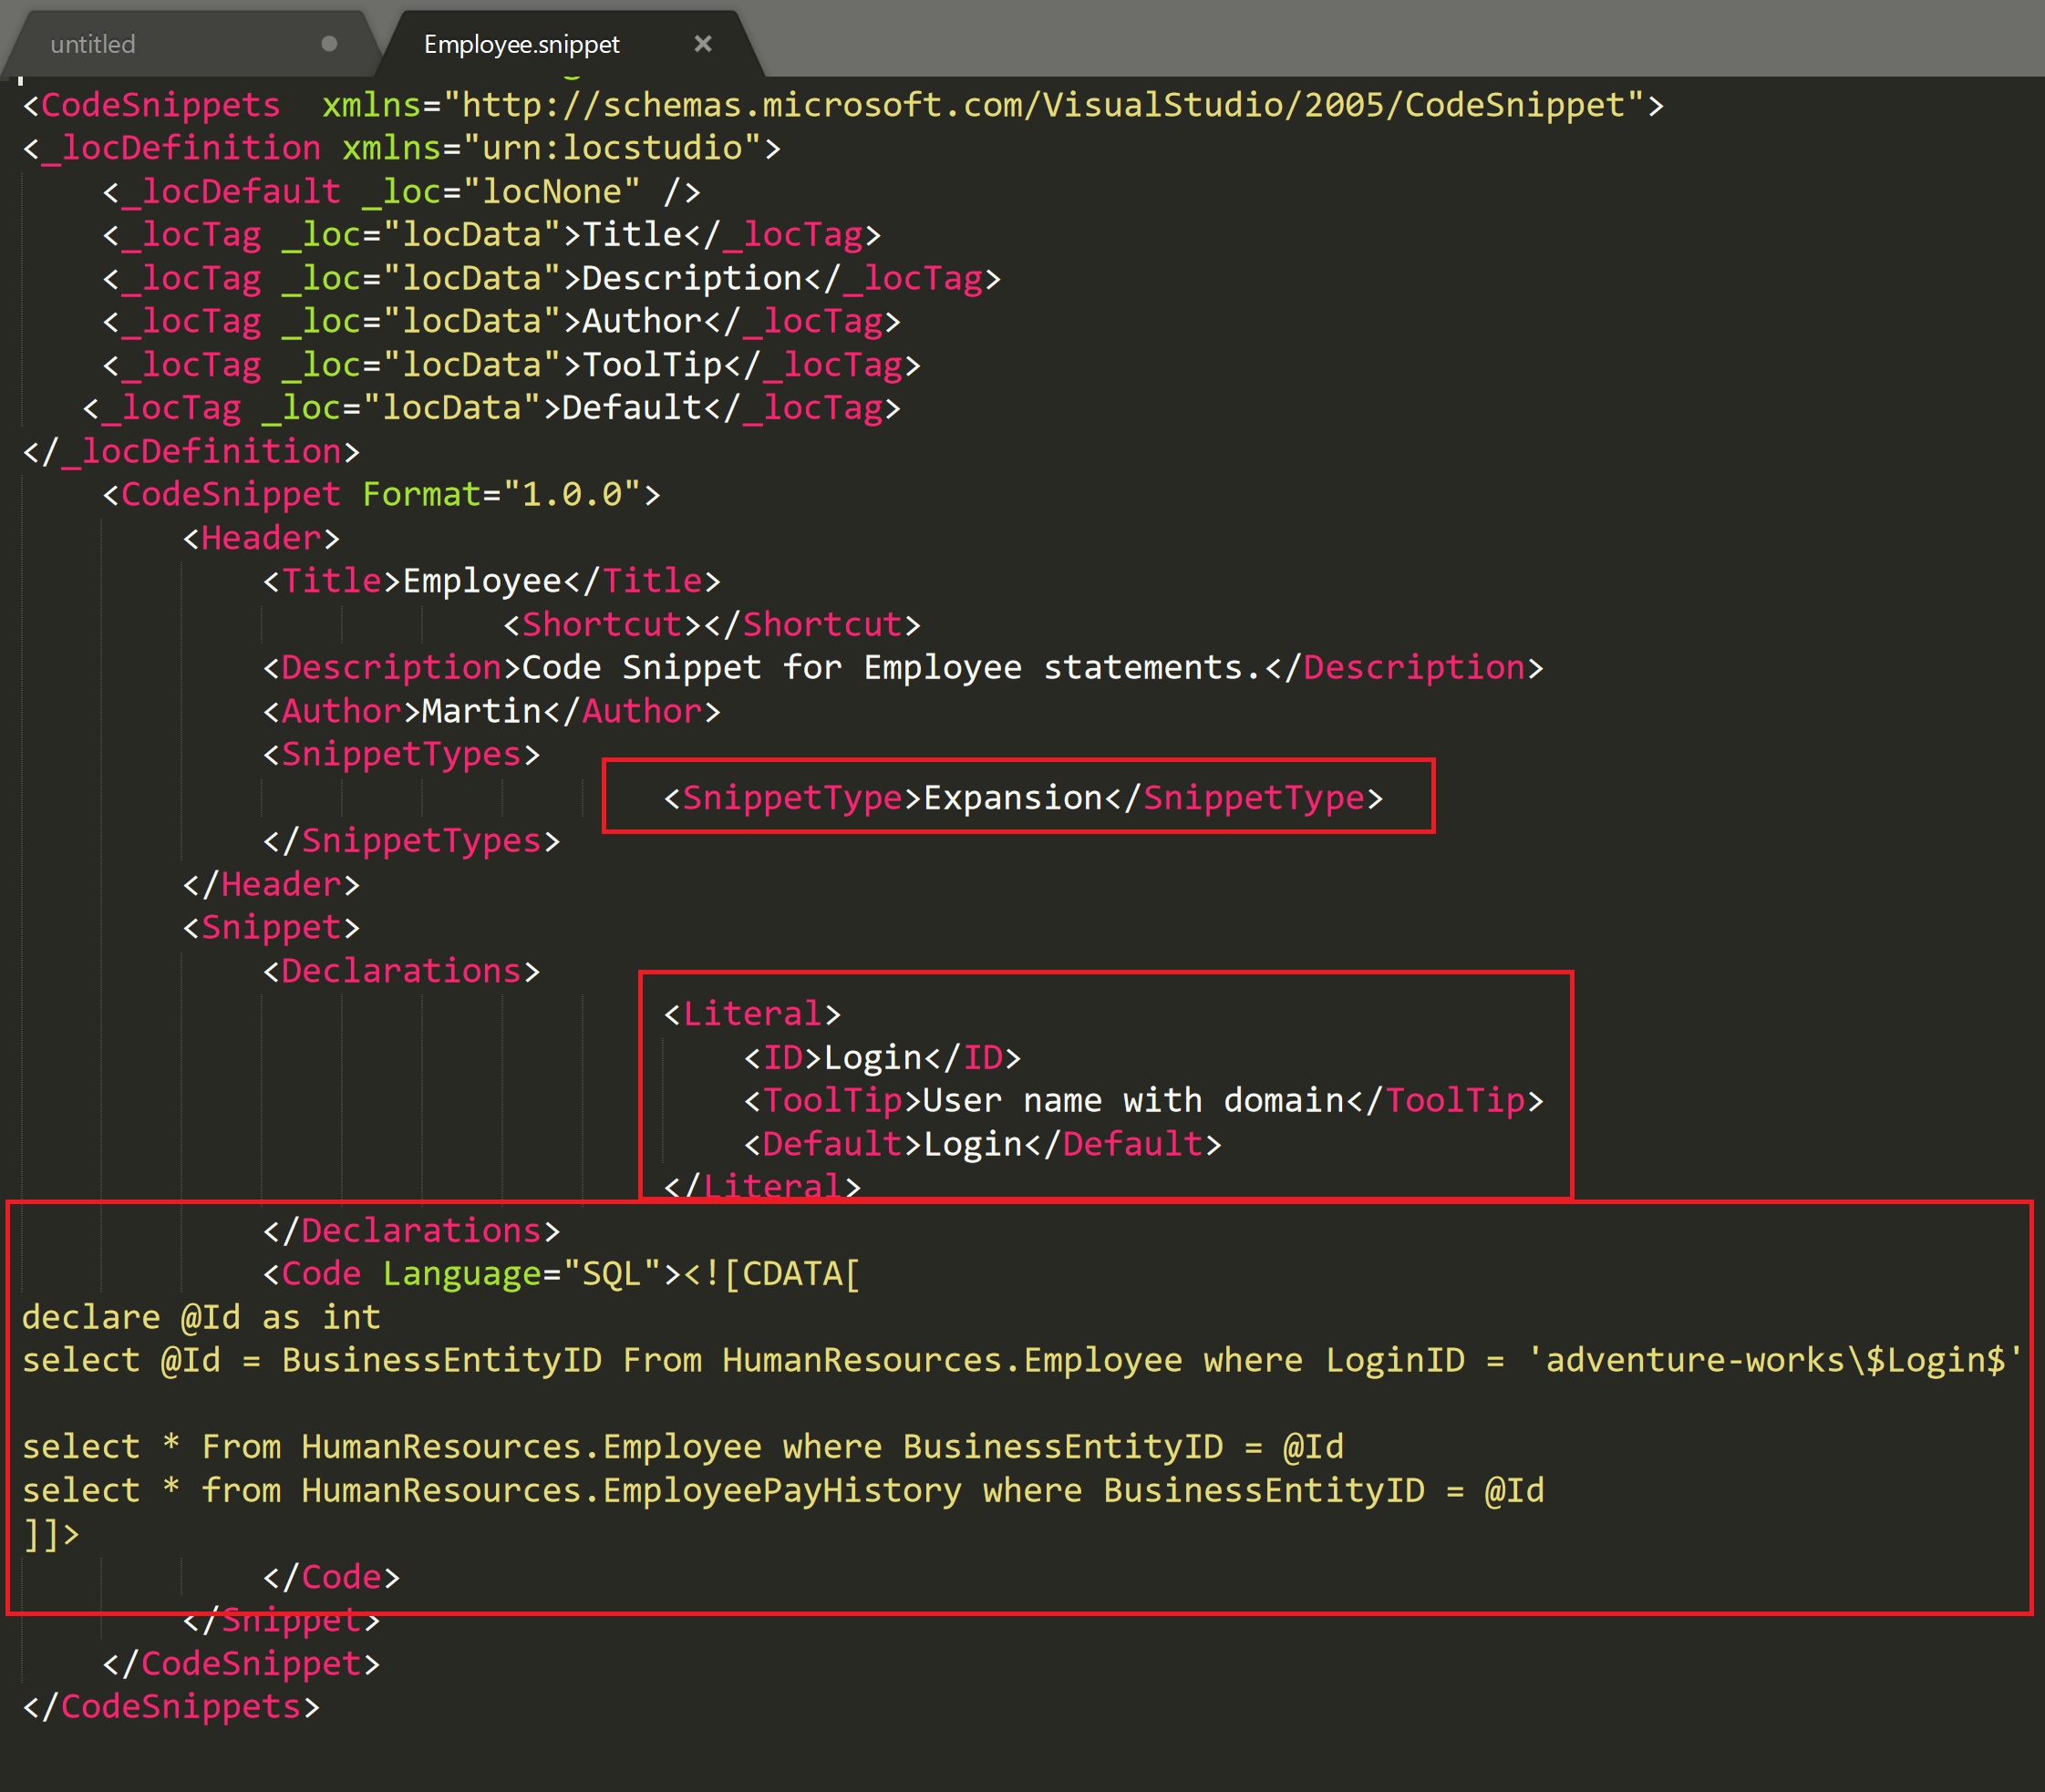
There are three important sections in the above snippet – SnippetType, Literal and Code. SnippetType can be either Expansion or SurroundsWith. Literals are the variables used in the Code. Code is obviously where the code snippet is placed. A shortcut can also be assigned for this code snippet using Shortcut tag. The above code snippet helps to run couple of statements based on the Login provided by the user when the code snippet is inserted. To add the above code snippet, go to Tools –> Code Snippets Manager, and add the snippet under “My Code Snippets” folder.
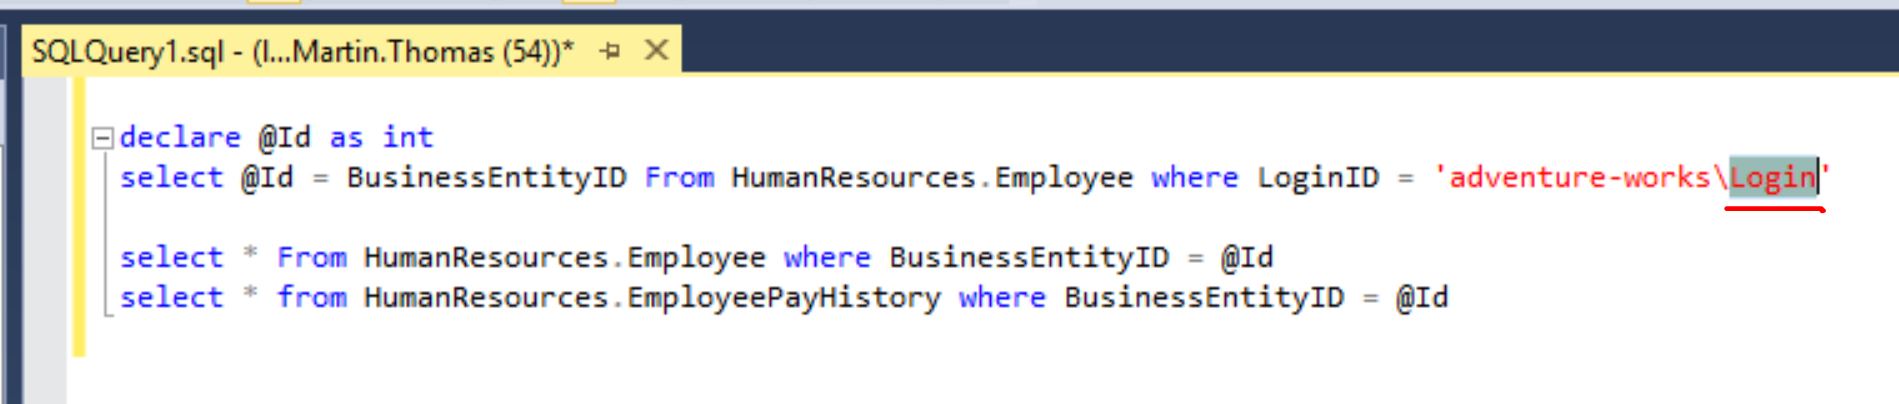
To insert an Expansion type snippet, press keys Ctrl+k,Ctrl+x (use Ctrl+k,Ctrl+s to insert a SurroundsWith type snippet) and then simply select the snippet. This will insert the code into the editor. Snippets support literal (variables like Login in the script) highlighting and the values can therefore be easily inserted in place of the literal.
Vertical Tab Group
This is a feature available in all IDEs and something every developer uses at least when reviewing the changes. This is quite useful in SSMS too when comparing results of same queries in different databases or servers. To split the windows vertically when there are more than one query window, select Window –> New Vertical Tab Group. To undo this, select Window –> Move to Previous Tab Group.

Results to File/Grid
SSMS, by default, displays results in a table/grid format. This is extremely useful as SQL Server is a relational database. But often it is required to send data to someone for analysis. One way to do this is to copy the results from the grid and paste it to an editor like MS Excel. SSMS provides a shortcut to do this. From the taskbar, you can select the option “Results To File” and this will directly save the result to a file. This is quite handy when the result set is huge as the copy paste could take a while to work.
There are few interesting configuration options with Results To Grid and Results To Text that are worth mentioning. First one is the option to “Retain CR/LF on copy or save” in Results To Grid. When I first knew about this option, I was quite surprised that the default behavior is not to retain CR/LF. This means that if your data contains a new line character, probably because the column contains data from a multiline textbox, then the copied data from Results Grid will have it always in a single line. Depending on the circumstances, it could make sense or not. In my opinion, there should be at least some indicator or a shortcut button on toolbar to switch it on/off.
Another interesting option, in Results To Text, is that it supports custom delimiter. In many cases, we would want to use some other character, say pipe (“|”) as the delimiter instead of comma in the generated file to separate the column data.
Include Client Statistics
“Include Client Statistics” option when turned on shows information about Query Profile, Network and Time. Probably, the most useful data displayed is the “Total execution time”. This shows the time required to get the query results which is very useful when fine tuning stored procedures or functions. Statistics is displayed for the last 10 queries executed and average is also calculated for each data point.
“Include Client Statistics” option can be selected from the taskbar or from the menu option Query –> Include Client Statistics.

Activity Monitor
Use of Activity Monitor can be summarised by saying the analogy, “Activity Monitor is the Task Manager for SQL Server”.
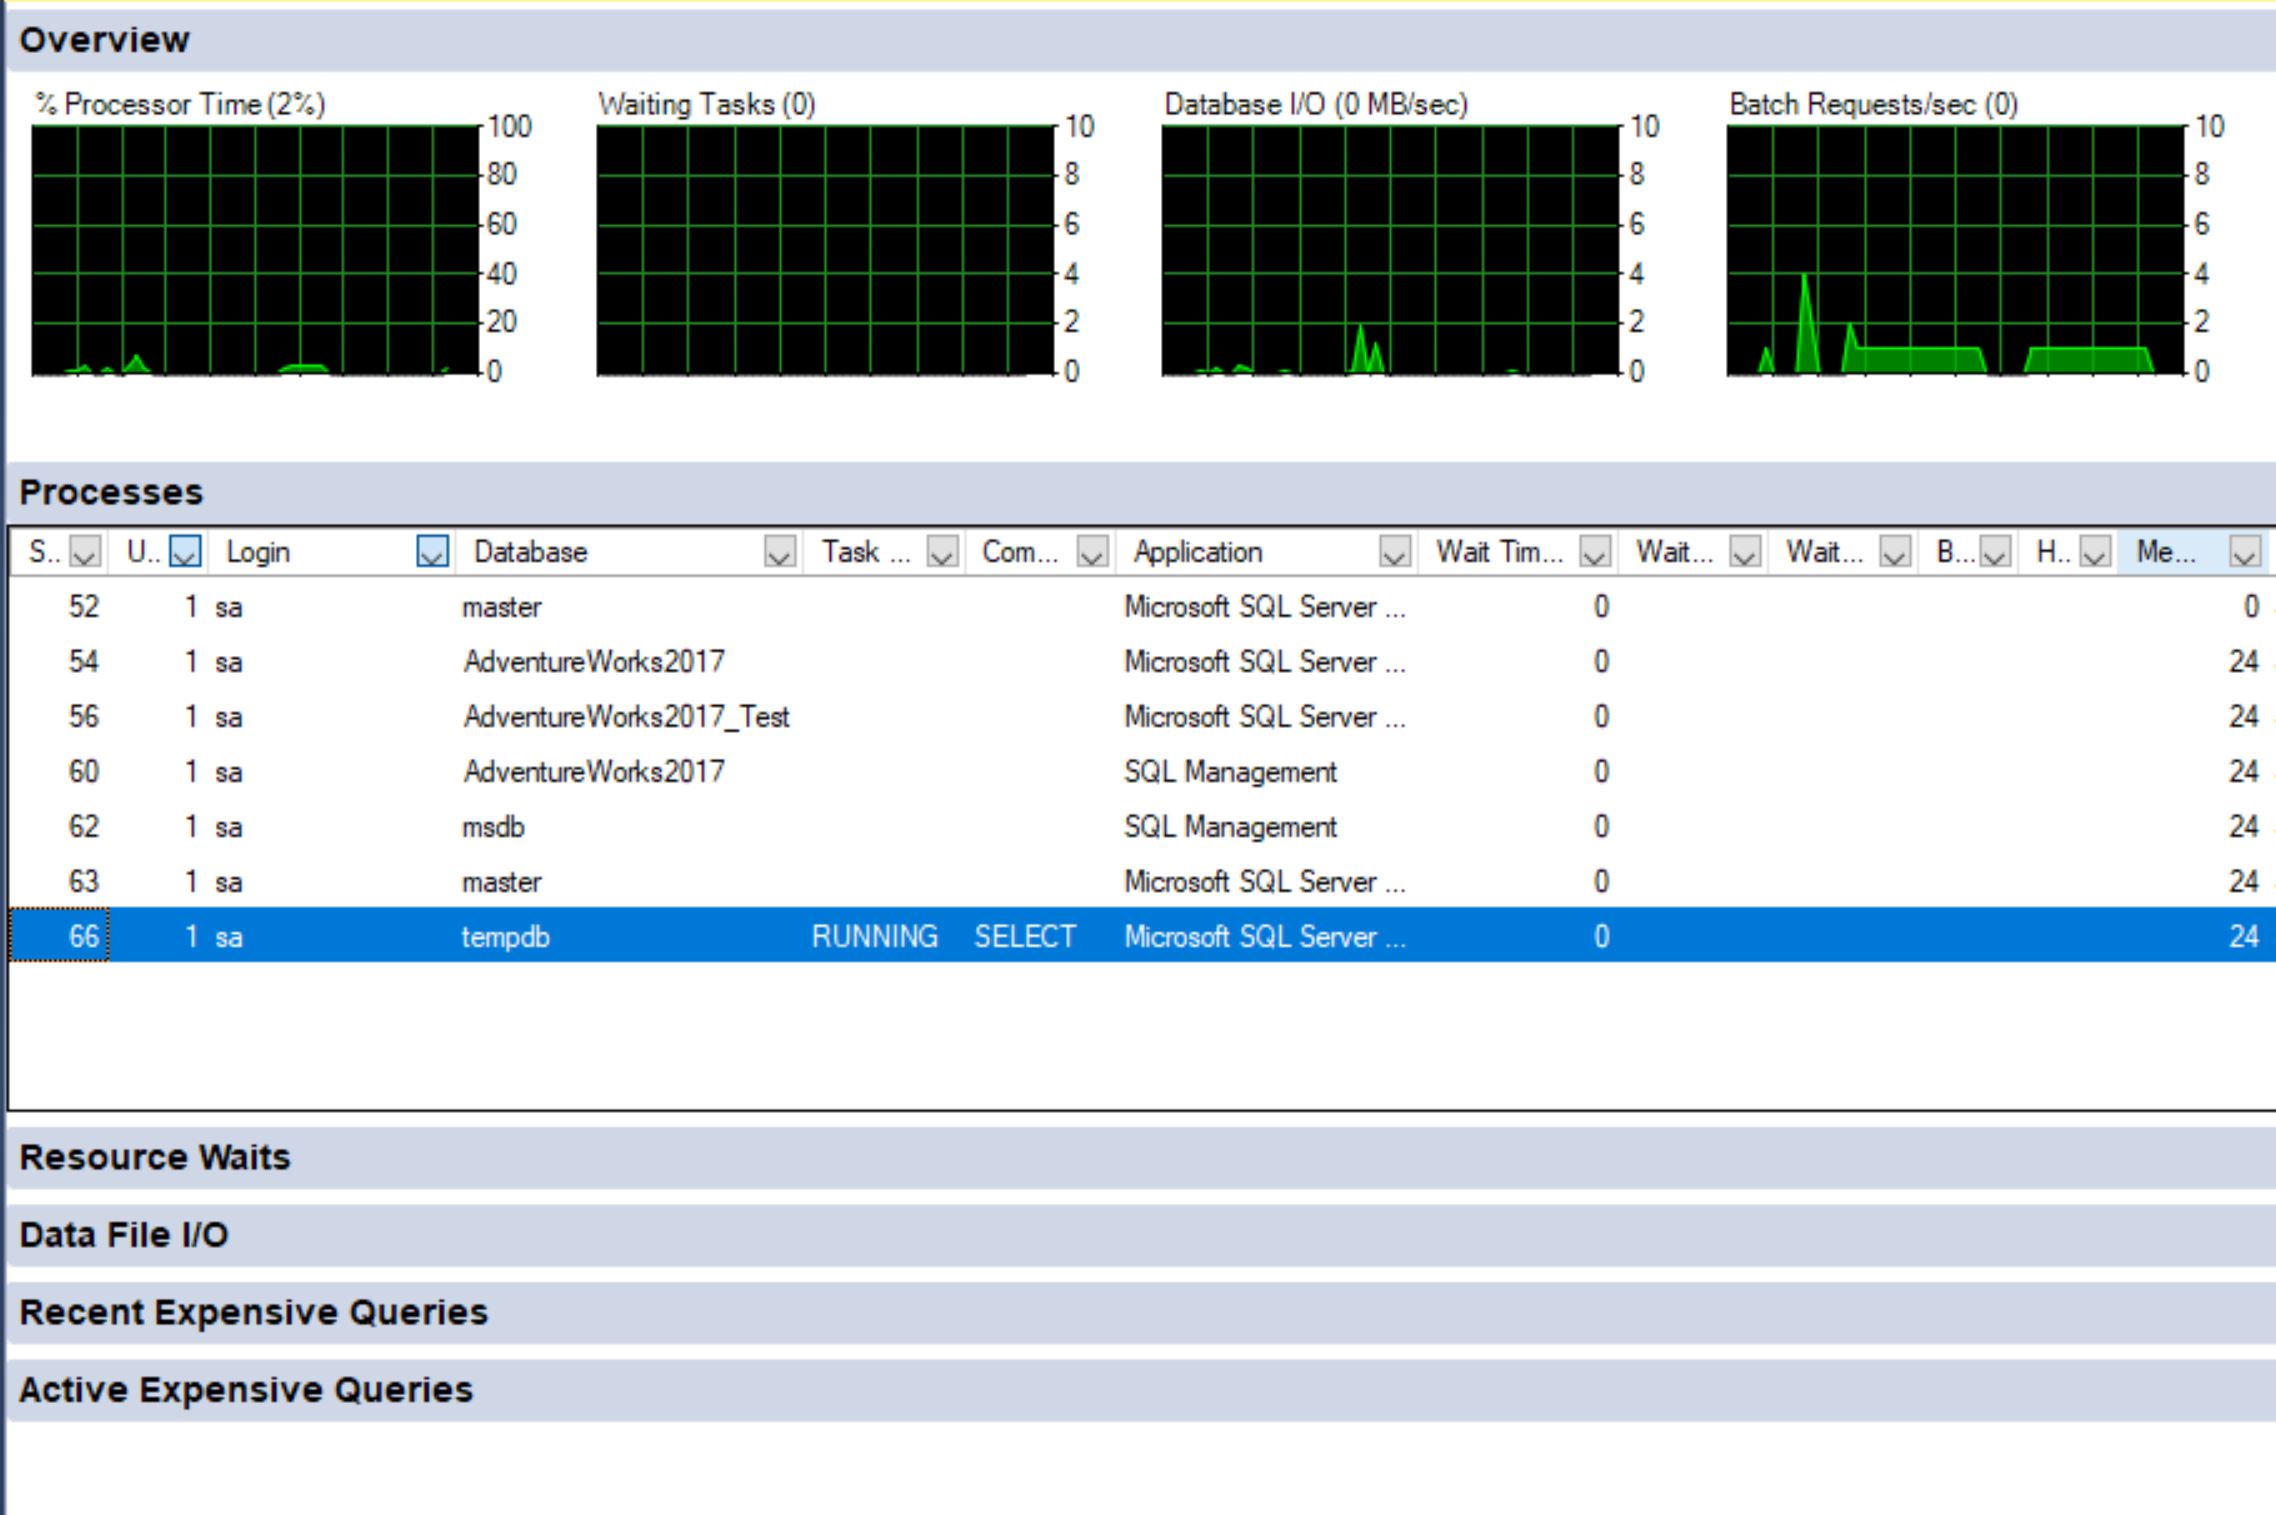
“sp_who2” stored procedure could be used to quickly display just the details of the Processes shown in Activity Monitor. But Activity Monitor displays a few other interesting details as well like “Recent Expensive Queries” and “Data File I/O”. From Recent/Active Expensive Queries one could find the problematic query and generate the Execution Plan too.
“SELECT – INTO” to create tables quickly
“SELECT – INTO” clause is frequently used in stored procedures to load data into temporary tables. But an interesting use of this is to copy a table and create new one in the database with a different name. This is quite handy when doing analysis or experiments and want to take backup of couple of tables instead of the whole database. The syntax is similar to SELECT statement. In the above example, a new table called Employee_Backup will be created in HumaResources schema which will have same data and schema as that of Employee.
select *
into HumanResources.Employee_Backup
From HumanResources.Employee
Dynamic Data Masking
Dynamic Data Masking is a feature available in SQL Server since 2016 version. Unfortunately, this is not configurable using SSMS yet. Though, this post’s scope is around SSMS, I thought it is best to include this one as an exception due to its significance. DDM helps in setting specific columns in a table as “MASKED” so that users with less privileges will not be able to see sensitive data when querying the table. It is also helpful when sharing data outside one’s organization. No need to write your own masking logic anymore but you could use this inbuilt feature to do this. For example, in the below query results, NationalIDNumber and LoginID are masked.
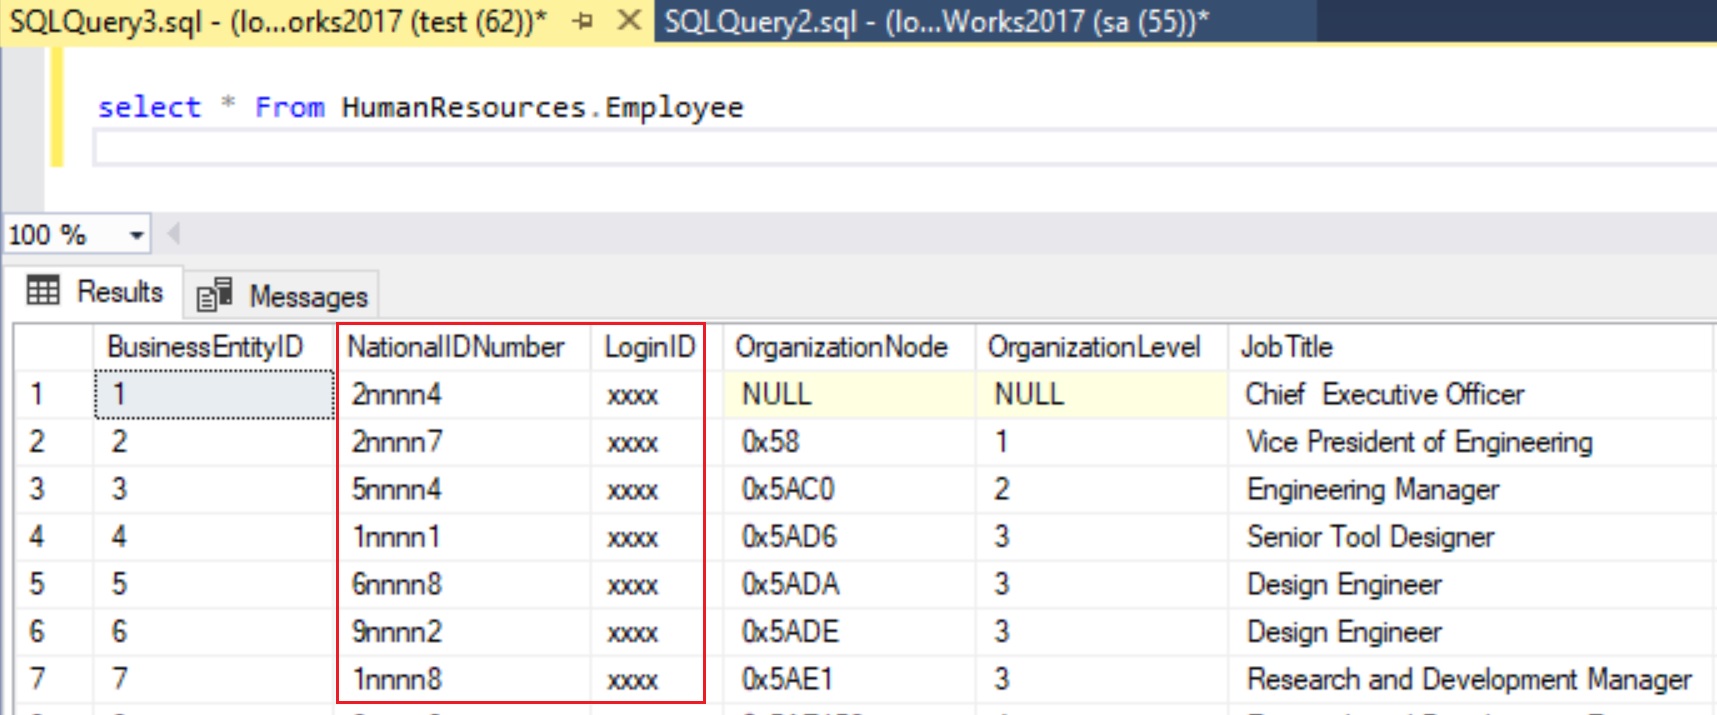
The alter script used to make this work is given below:
alter table HumanResources.Employee alter column LoginID nvarchar(256) MASKED with (function = 'default()')
alter table HumanResources.Employee alter column NationalIDNumber nvarchar(256) MASKED with (function = 'partial(1, "nnnn", 1)')
Linked Server
This feature was a life saver for me on multiple occasions. A Linked Server can be used to access data from multiple sources though the most common scenario is to access data from multiple SQL Servers. Though we can run same queries on vertical windows targeting different environments and compare the results, it might not be feasible always to compare the results visually. It is accurate and easy to compare the data in different environment by writing a query. Now, we need Linked Server to connect to the external database. For example, using the below query I am trying to find the missing departments in “MYDEV” server.
select * from HumanResources.Department srcDep
left join MYDEV.AdventureWorks2017.HumanResources.Department tgtDep on tgtDep.DepartmentID = srcDep.DepartmentID
where tgtDep.DepartmentID is null
Creating a Linked Server can be done by right clicking Server Objects from Object Explorer and selecting New…Linked Server.
Summary
SSMS is a wonderful editor that has quite a lot of features. I am pretty sure I have barely scratched the surface here. If any of your favorite feature or option is not included here, please let me know in the comments.
